<img loading=“lazy” src=“https://www.simplejoy.com/wp-content/uploads/2022/10/No-Bake-Chocolate-Oatmeal-Cookies-Pin-8-150x150.jpg" onerror=“this.onerror=null;this.src=‘https://blogger.googleusercontent.com/img/a/AVvXsEhe7F7TRXHtjiKvHb5vS7DmnxvpHiDyoYyYvm1nHB3Qp2_w3BnM6A2eq4v7FYxCC9bfZt3a9vIMtAYEKUiaDQbHMg-ViyGmRIj39MLp0bGFfgfYw1Dc9q_H-T0wiTm3l0Uq42dETrN9eC8aGJ9_IORZsxST1AcLR7np1koOfcc7tnHa4S8Mwz_xD9d0=s16000';" alt=“Pinterest graphic for No Bake Chocolate Oatmeal Cookies recipe. Top image is photo of a stack of No Bake Chocolate Oatmeal Cookies with a bite taken out of the top cookie. Text says, “No Bake Chocolate Oatmeal Cookies simplejoy.com.” Bottom image is an overhead photo of No Bake Chocolate Oatmeal Cookies on a baking sheet with wax paper. - 1”>
<img loading=“lazy” src=“https://www.simplejoy.com/wp-content/uploads/2022/10/No-Bake-Chocolate-Oatmeal-Cookies-Pin-7-150x150.jpg" onerror=“this.onerror=null;this.src=‘https://blogger.googleusercontent.com/img/a/AVvXsEhe7F7TRXHtjiKvHb5vS7DmnxvpHiDyoYyYvm1nHB3Qp2_w3BnM6A2eq4v7FYxCC9bfZt3a9vIMtAYEKUiaDQbHMg-ViyGmRIj39MLp0bGFfgfYw1Dc9q_H-T0wiTm3l0Uq42dETrN9eC8aGJ9_IORZsxST1AcLR7np1koOfcc7tnHa4S8Mwz_xD9d0=s16000';" alt=“Pinterest graphic for No Bake Chocolate Oatmeal Cookies recipe. Text says, No bake chocolate cookies simplejoy.com.” Image is a photo of a stack of No Bake Chocolate Oatmeal Cookies. - 2”>
<img loading=“lazy” src=“https://www.simplejoy.com/wp-content/uploads/2022/10/No-Bake-Chocolate-Oatmeal-Cookies-Pin-3-150x150.jpg" onerror=“this.onerror=null;this.src=‘https://blogger.googleusercontent.com/img/a/AVvXsEhe7F7TRXHtjiKvHb5vS7DmnxvpHiDyoYyYvm1nHB3Qp2_w3BnM6A2eq4v7FYxCC9bfZt3a9vIMtAYEKUiaDQbHMg-ViyGmRIj39MLp0bGFfgfYw1Dc9q_H-T0wiTm3l0Uq42dETrN9eC8aGJ9_IORZsxST1AcLR7np1koOfcc7tnHa4S8Mwz_xD9d0=s16000';" alt=“Pinterest graphic for No Bake Chocolate Oatmeal Cookies. Image is photo of a stack of No Bake Chocolate Oatmeal Cookies with a bite taken out of the top cookie. Text says, “No Bake Chocolate Oatmeal Cookies simplejoy.com” - 3”>
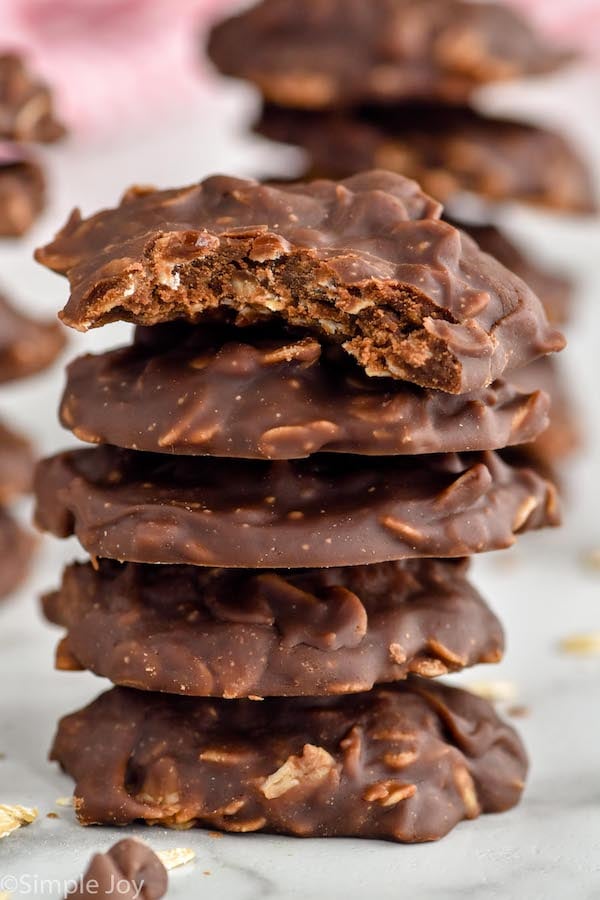
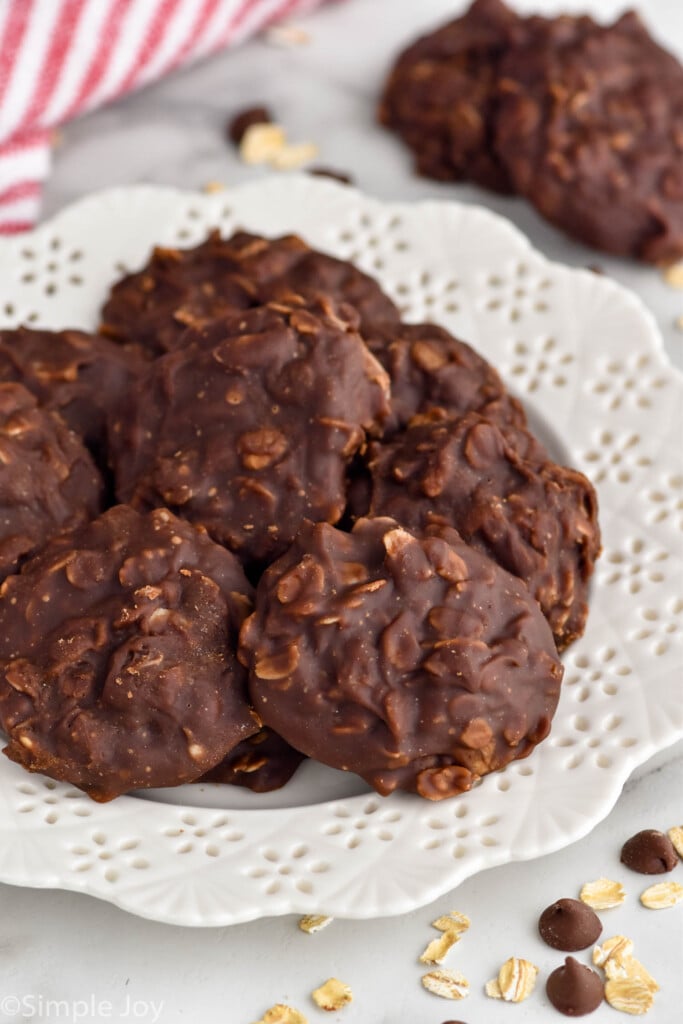
These No Bake Chocolate Oatmeal Cookies are so easy to make and are melt-in-your-mouth delicious. They are going to be your new go-to treat when you need a chocolate fix.
One of my most popular recipes, especially around the holidays, is my Chocolate No Bake Cookies . They are truly delicious. Though every time I share them on social media, I get asked the same question: How do I make these without coconut? Fair enough; I know not everyone loves coconut as much as I do.
These amazing no bake cookies are everything you like about the original recipe without the coconut. Just a quick swap of more oats for coconut does the trick, and you get amazing melt-in-your-mouth chocolate cookies.
How to Make Chocolate No Bake Oatmeal Cookies
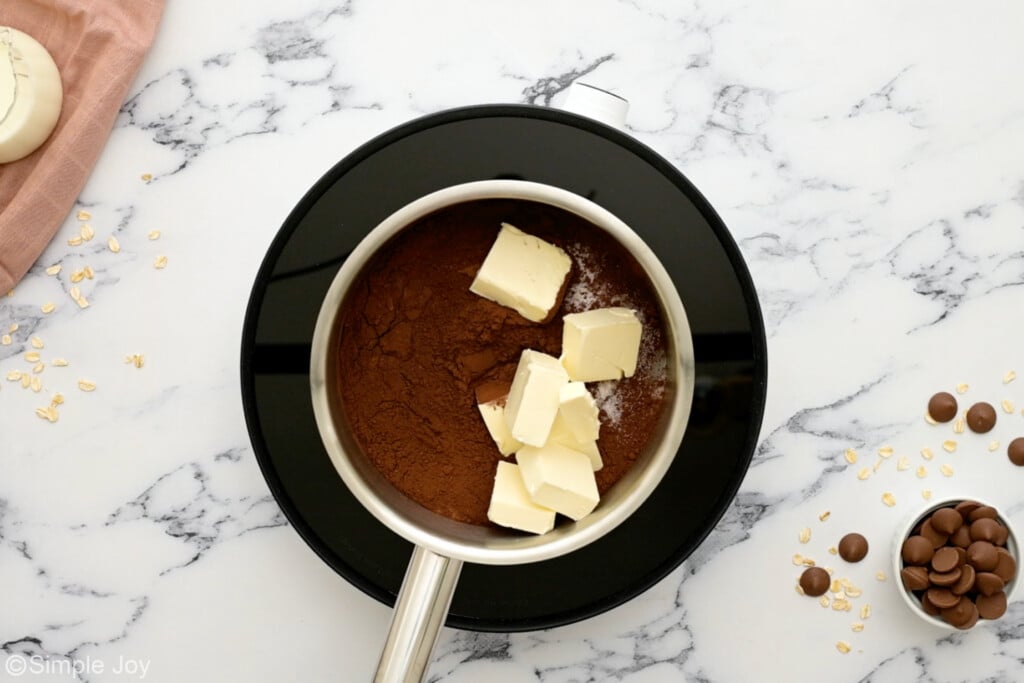
Combine the sugar, milk, butter, and cocoa powder.
Start stirring right away so the sugar doesn’t burn.
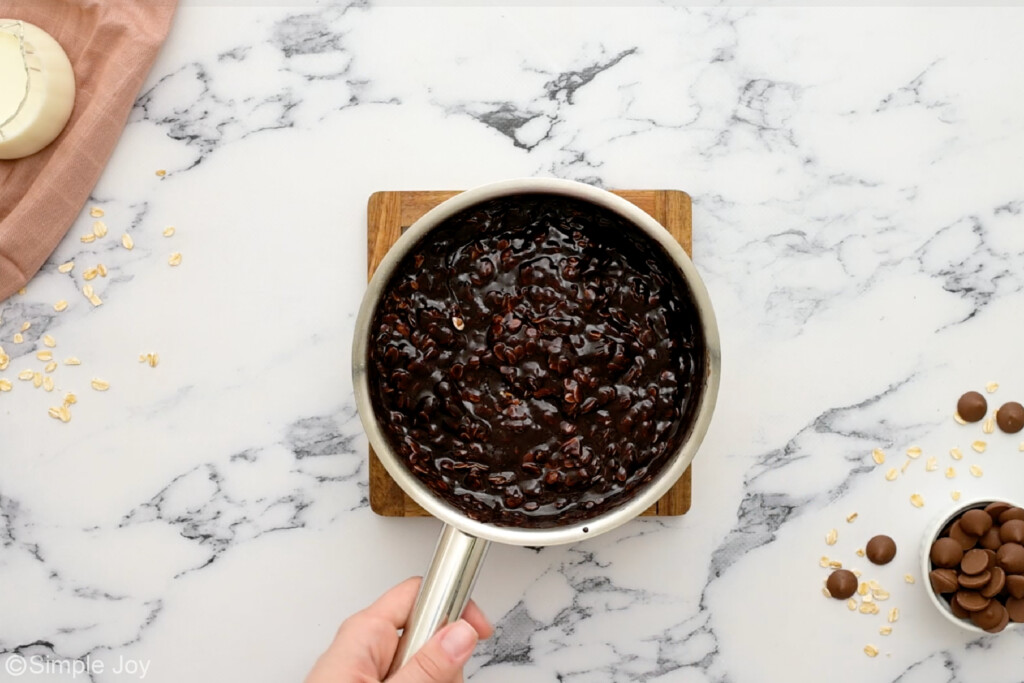
Boil for exactly one minute.
This is a very important step. The liquid should be at a roaring boil for one minute. Use a timer to make sure it has been a full 60 seconds, and do not start the timer until you see a full roaring boil.
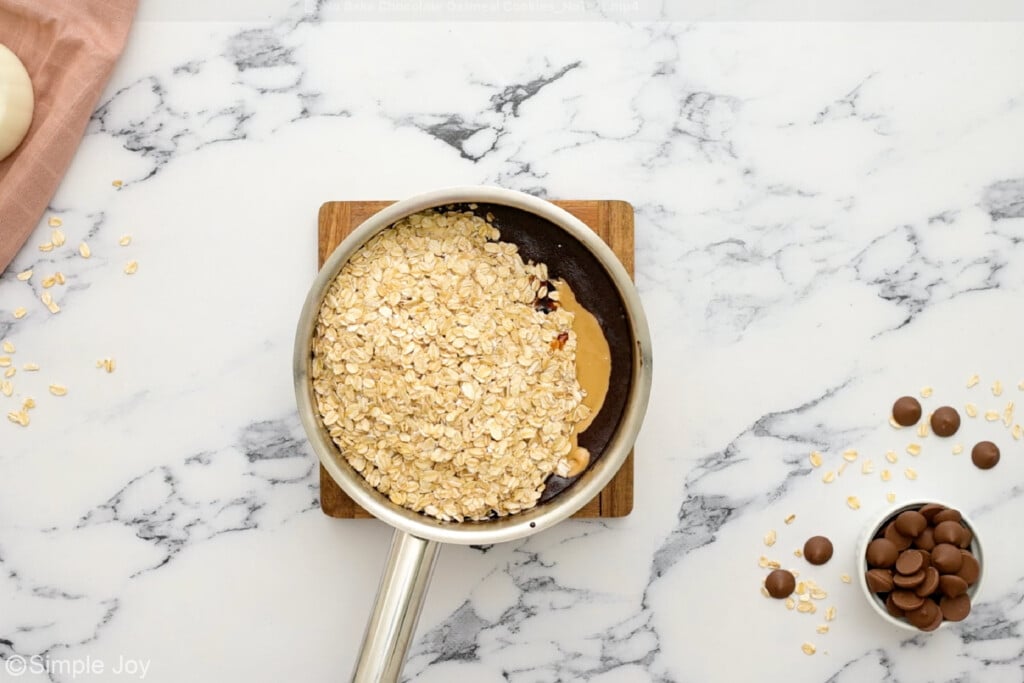
Stir in the rest of the ingredients.
Remove the pan from the heat and stir in the oats, peanut butter, and vanilla, moving somewhat quickly.
Form into cookies.
Drop the mixture by spoonfuls onto wax paper or parchment paper and let cool. I like to use a cookie scoop I this step for consistent sized cookies and because it makes this step so fast.
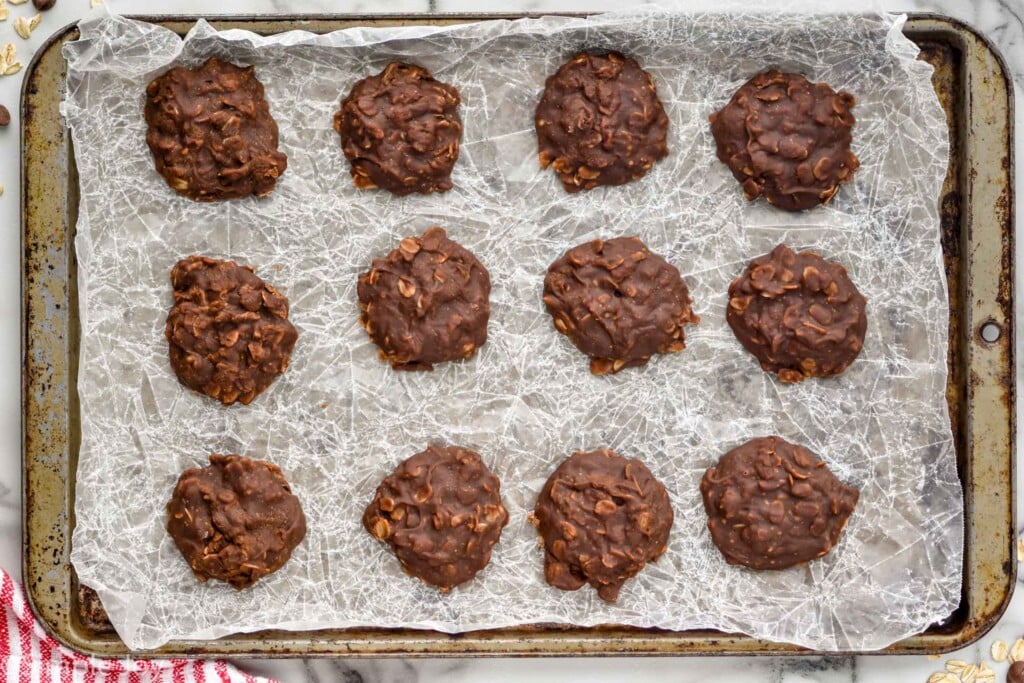
The key to getting the cookies to set is bringing your butter and sugar mixture to a full raging boil for a full minute, watching closely. If your kitchen is overly warm or humid, place the cookies in the refrigerator to set.
Tips For No Bake Cookies
- Look for a rolling boil. You will want large bubbles in the middle of the pan with a foamy and frothy boil before moving to the next step. Skipping this step or not boiling long enough will result in cookies that don’t set up.
- Stir continuously. Your ingredients will burn if you walk away from the pan.
- Work quickly. This recipe moves quickly. Once the mixture has boiled and you are adding the other ingredients, move fast. This will allow you to scoop all your cookies before they start to set.
- Use old-fashioned oats. No Bake Chocolate Oatmeal Cookies work best with old-fashioned oats. Quick oats are more fine so have a different texture and may not set up as well. If all you have on hand is quick-cooking oats, you can still make these and you will enjoy them.
- Use real butter, not margarine. The type of butter also matters. I recommend that you don’t use Kirkland butter as it is notorious for not working in this recipe.
Storing and Freezing
Store your No Bake Chocolate Oatmeal Cookies in an airtight container at room temperature for up to two weeks.
These No Bake Cookies are great to freeze. Once cooled, place them in a freezer bag or freezer-safe container and freeze for up to three months. Enjoy frozen or let thaw on the counter or in the refrigerator.
If you try this recipe for No Bake Chocolate Oatmeal Cookies or any of my other recipes, leave me a comment to tell me what you think!
- Youtube
- Newsletter
Ingredients
- 2 1/4 cups old fashioned oats (200.25 grams) see note 1
- 1 cup creamy peanut butter (270 grams)
- 2 cups granulated sugar (396 grams)
- 1/2 cup milk I used skim (118.294 ml)
- 8 tablespoons butter (113 grams) see note 2
- 1/2 cup cocoa powder (42 grams)
- 1 tablespoon vanilla
Instructions
- Line 2 baking sheets with wax paper.
- Add the oats and peanut butter to a large bowl. Set aside. 2 1/4 cups old fashioned oats, 1 cup creamy peanut butter
- In a large saucepan over medium heat, combine the granulated sugar, milk, butter, and cocoa powder. Bring to a roaring boil, while stirring consistently. 2 cups granulated sugar, 1/2 cup milk, 8 tablespoons butter, 1/2 cup cocoa powder
- Boil for one minute while continuing to stir. (It is very important that it is at a full boil for one full minute.) Stir in the vanilla. 1 tablespoon vanilla
- Remove from the heat, and working quickly, pour it over the oat and peanut butter mixture. Stir to combine.
- Using a large spoon, spoon large spoonfuls of the mixture onto the waxed paper. Allow to cool completely. Eat immediately or store in an airtight container for up to a week.
Recipe Video
Notes
- These work best with old-fashioned oats. Quick oats are more fine so have a different texture and may not set up as well. If all you have on hand is quick-cooking oats, you can still make these and you will enjoy them.
- Use butter, not margarine. The type of butter matters, do not use Kirkland butter as it is notorious for not working in this recipe.

did you make this
No Bake Chocolate Oatmeal Cookies
Facebook
Twitter
Pinterest
Youtube
Newsletter
Snowball Cookies
The Best Snickerdoodles
Thumbprint Cookies
Haystacks Recipe
Instagram
Facebook
Youtube
Newsletter

No Bake Chocolate Oatmeal Cookies
Ingredients
- 2 1/4 cups old fashioned oats (200.25 grams) see note 1
- 1 cup creamy peanut butter (270 grams)
- 2 cups granulated sugar (396 grams)
- 1/2 cup milk I used skim (118.294 ml)
- 8 tablespoons butter (113 grams) see note 2
- 1/2 cup cocoa powder (42 grams)
- 1 tablespoon vanilla
Instructions
- Line 2 baking sheets with wax paper.
- Add the oats and peanut butter to a large bowl. Set aside. 2 1/4 cups old fashioned oats, 1 cup creamy peanut butter
- In a large saucepan over medium heat, combine the granulated sugar, milk, butter, and cocoa powder. Bring to a roaring boil, while stirring consistently. 2 cups granulated sugar, 1/2 cup milk, 8 tablespoons butter, 1/2 cup cocoa powder
- Boil for one minute while continuing to stir. (It is very important that it is at a full boil for one full minute.) Stir in the vanilla. 1 tablespoon vanilla
- Remove from the heat, and working quickly, pour it over the oat and peanut butter mixture. Stir to combine.
- Using a large spoon, spoon large spoonfuls of the mixture onto the waxed paper. Allow to cool completely. Eat immediately or store in an airtight container for up to a week.
Video
Notes
- These work best with old-fashioned oats. Quick oats are more fine so have a different texture and may not set up as well. If all you have on hand is quick-cooking oats, you can still make these and you will enjoy them.
- Use butter, not margarine. The type of butter matters, do not use Kirkland butter as it is notorious for not working in this recipe.
Nutrition
- Youtube
- Newsletter
<img loading=“lazy” src=“https://www.simplejoy.com/wp-content/uploads/2024/11/Thumbprint-Cookies-Pin-2-150x150.jpg" onerror=“this.onerror=null;this.src=‘https://blogger.googleusercontent.com/img/a/AVvXsEhe7F7TRXHtjiKvHb5vS7DmnxvpHiDyoYyYvm1nHB3Qp2_w3BnM6A2eq4v7FYxCC9bfZt3a9vIMtAYEKUiaDQbHMg-ViyGmRIj39MLp0bGFfgfYw1Dc9q_H-T0wiTm3l0Uq42dETrN9eC8aGJ9_IORZsxST1AcLR7np1koOfcc7tnHa4S8Mwz_xD9d0=s16000';" alt=“Pinterest graphic for Thumbprint Cookies recipe. Image shows overhead view of Thumbprint Cookies filled with two different colors of jam on the countertop. Text says, “Thumbprint Cookies simplejoy.com.” - 12”>
<img loading=“lazy” src=“https://www.simplejoy.com/wp-content/uploads/2024/11/Thumbprint-Cookies-Pin-5-150x150.jpg" onerror=“this.onerror=null;this.src=‘https://blogger.googleusercontent.com/img/a/AVvXsEhe7F7TRXHtjiKvHb5vS7DmnxvpHiDyoYyYvm1nHB3Qp2_w3BnM6A2eq4v7FYxCC9bfZt3a9vIMtAYEKUiaDQbHMg-ViyGmRIj39MLp0bGFfgfYw1Dc9q_H-T0wiTm3l0Uq42dETrN9eC8aGJ9_IORZsxST1AcLR7np1koOfcc7tnHa4S8Mwz_xD9d0=s16000';" alt=“Pinterest graphic for Thumbprint Cookies recipe. Top image is close up up Thumbprint Cookies. Bottom image is overhead view of Thumbprint Cookies on the counter, filled with two different colors of jam. Text says, “super easy Thumbprint Cookies simplejoy.com” - 13”>
<img loading=“lazy” src=“https://www.simplejoy.com/wp-content/uploads/2024/11/Thumbprint-Cookies-Pin-4-150x150.jpg" onerror=“this.onerror=null;this.src=‘https://blogger.googleusercontent.com/img/a/AVvXsEhe7F7TRXHtjiKvHb5vS7DmnxvpHiDyoYyYvm1nHB3Qp2_w3BnM6A2eq4v7FYxCC9bfZt3a9vIMtAYEKUiaDQbHMg-ViyGmRIj39MLp0bGFfgfYw1Dc9q_H-T0wiTm3l0Uq42dETrN9eC8aGJ9_IORZsxST1AcLR7np1koOfcc7tnHa4S8Mwz_xD9d0=s16000';" alt=“Pinterest graphic for Thumbprint Cookies recipe. Text says, “the best Thumbprint Cookies simplejoy.com.” Image is overhead view of Thumbprint Cookies filled with two different colors of jam on countertop. - 14”>
<img loading=“lazy” src=“https://www.simplejoy.com/wp-content/uploads/2024/11/Thumbprint-Cookies-Pin-3-150x150.jpg" onerror=“this.onerror=null;this.src=‘https://blogger.googleusercontent.com/img/a/AVvXsEhe7F7TRXHtjiKvHb5vS7DmnxvpHiDyoYyYvm1nHB3Qp2_w3BnM6A2eq4v7FYxCC9bfZt3a9vIMtAYEKUiaDQbHMg-ViyGmRIj39MLp0bGFfgfYw1Dc9q_H-T0wiTm3l0Uq42dETrN9eC8aGJ9_IORZsxST1AcLR7np1koOfcc7tnHa4S8Mwz_xD9d0=s16000';" alt=“Pinterest graphic for Thumbprint Cookies recipe. Text says, “The best Thumbprint Cookies simplejoy.com.” Image shows a plate of Thumbprint Cookies filled with two different colors of jam served on a plate.” - 15”>
<img loading=“lazy” src=“https://www.simplejoy.com/wp-content/uploads/2024/11/Thumbprint-Cookies-Pin-150x150.jpg" onerror=“this.onerror=null;this.src=‘https://blogger.googleusercontent.com/img/a/AVvXsEhe7F7TRXHtjiKvHb5vS7DmnxvpHiDyoYyYvm1nHB3Qp2_w3BnM6A2eq4v7FYxCC9bfZt3a9vIMtAYEKUiaDQbHMg-ViyGmRIj39MLp0bGFfgfYw1Dc9q_H-T0wiTm3l0Uq42dETrN9eC8aGJ9_IORZsxST1AcLR7np1koOfcc7tnHa4S8Mwz_xD9d0=s16000';" alt=“Pinterest graphic for Thumbprint Cookies recipe. Image shows close up of Thumbprint Cookies with two different colors of jam on a plate. Text says, “Tried and tested Thumbprint Cookies simplejoy.com” - 16”>
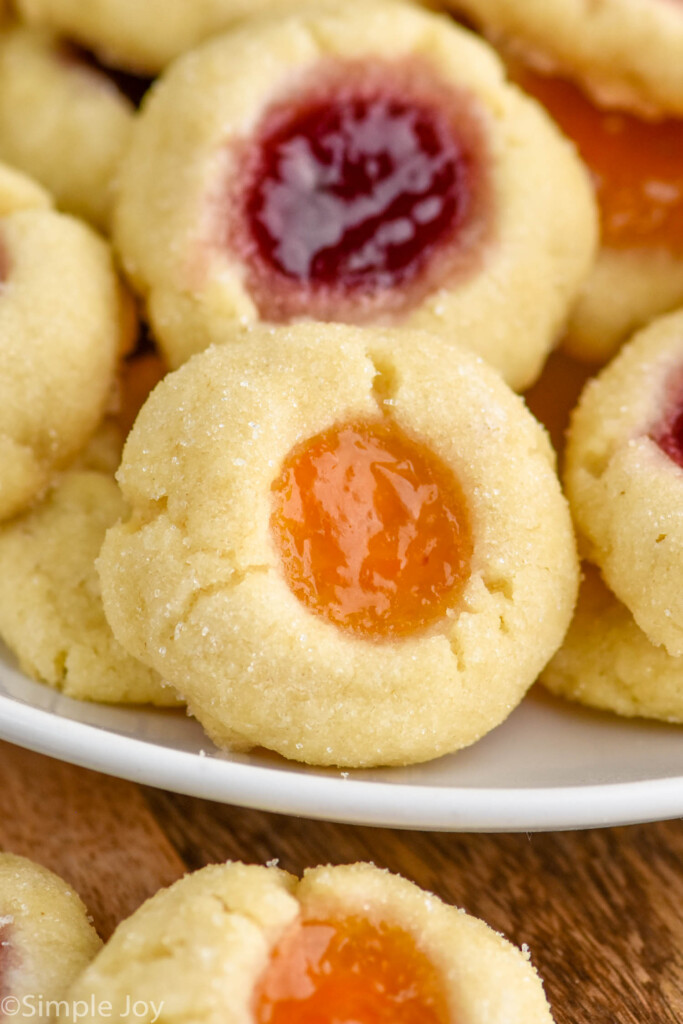
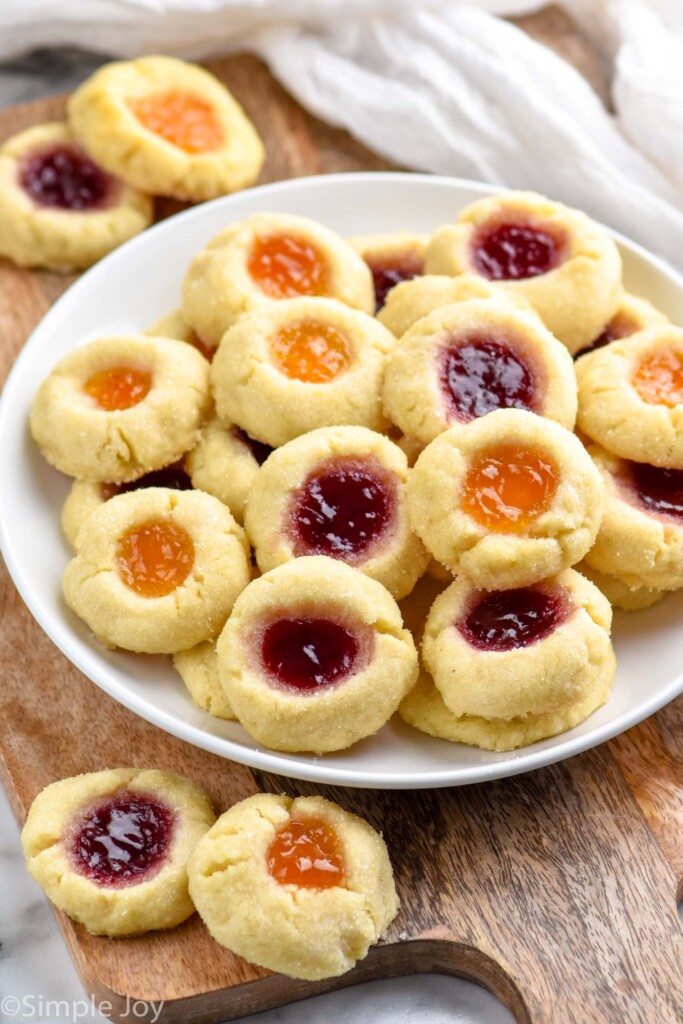
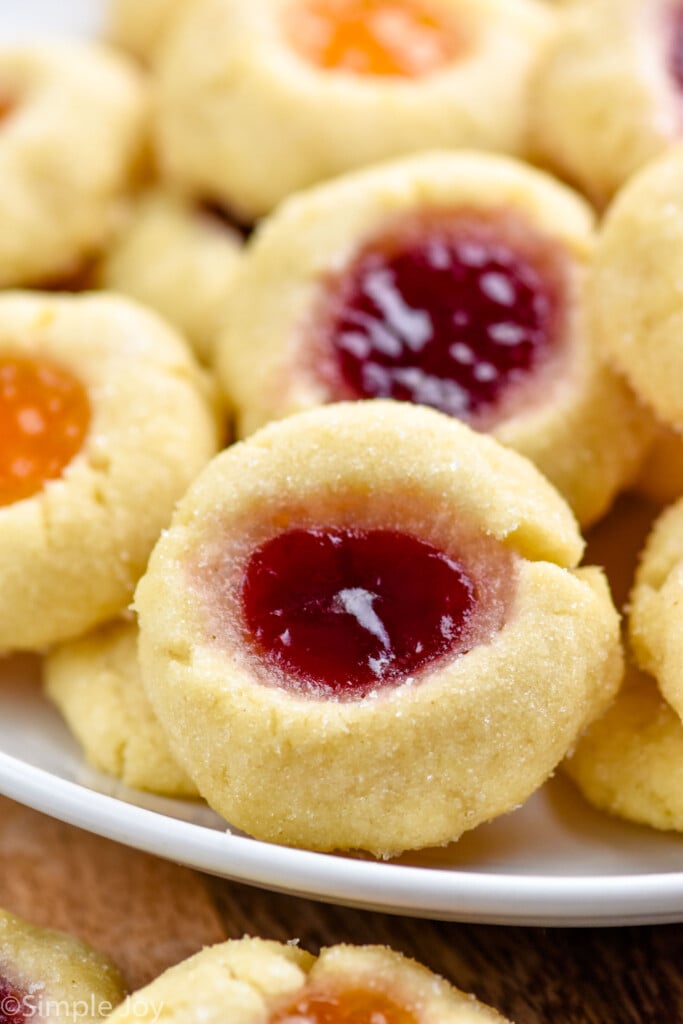
Thumbprint Cookies are perfect bites of deliciousness. Easy to make with a melt in your mouth dough, these cookies are tiny drops of heaven.
How to Make Thumbprint Cookies
Here is a brief overview of how this thumbprint cookie recipe comes together. For the full recipe including all measurements, scroll to the recipe card at the bottom of the post.
- Combine dry ingredients. Whisk together the flour and salt.
- Beat butter and sugar. This is an important step. Beat the butter and sugar together until light and fluffy, about three to six minutes. Then beat in the egg yolk, vanilla extract, and almond extract.
- Add in the flour mixture. Beat on low until it just begins to combine and then turn the power up to high until just combined.
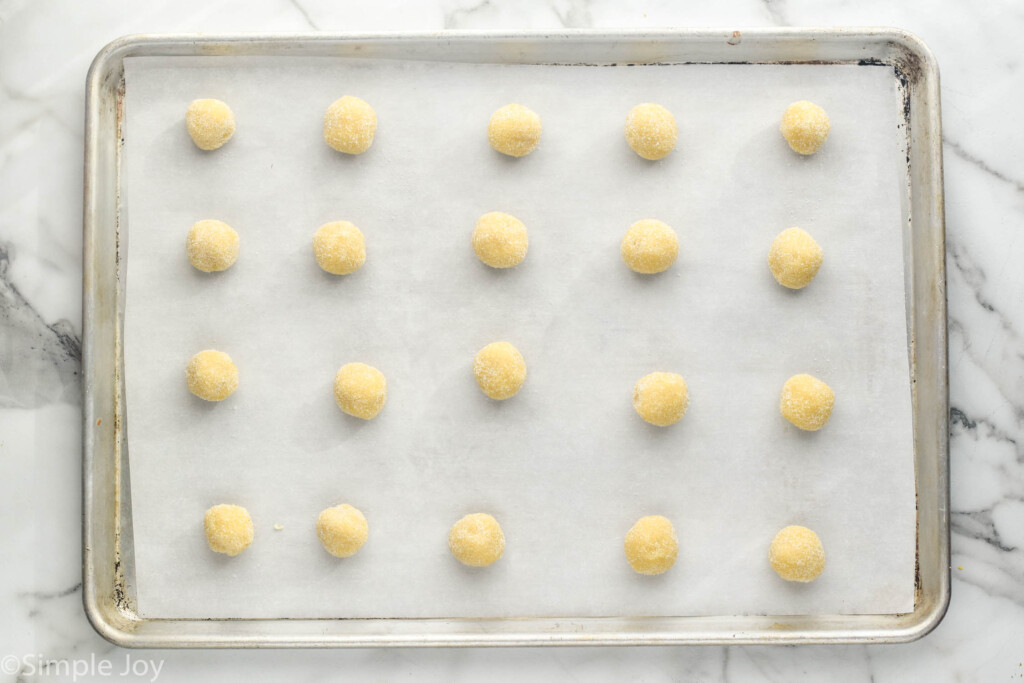
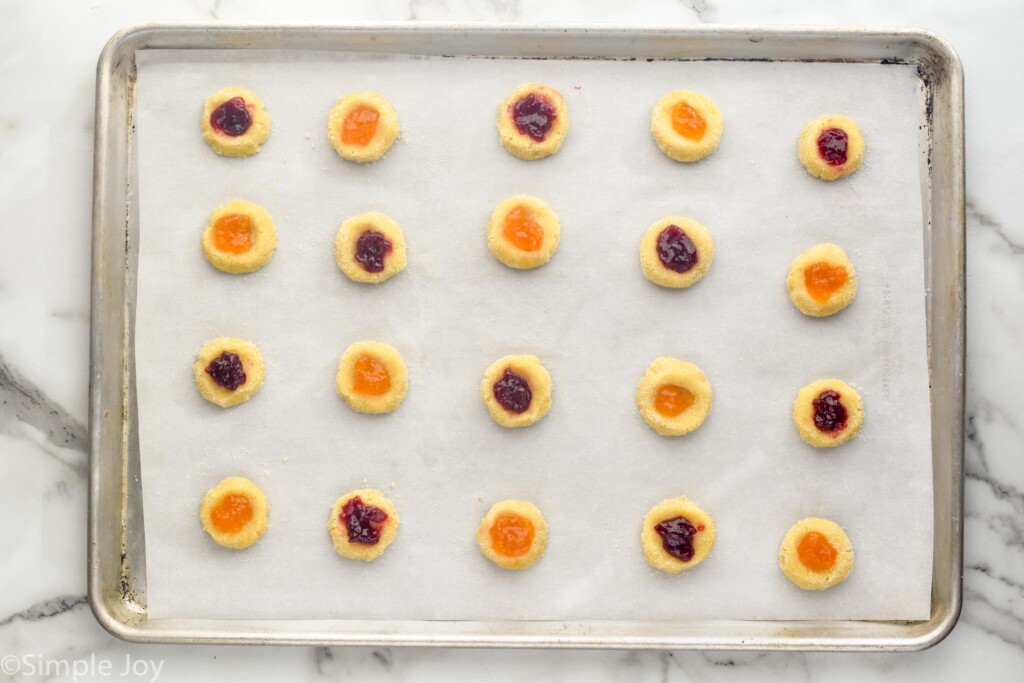
- Roll the dough into balls. Scoop the cookies with a tablespoon-sized cookie scoop or roll into one-inch balls. Roll in granulated sugar and place on prepared baking sheet.
- Add the jam. Using a clean finger or thumb, very gently make a small well in the center of each cookie. Fill with desired flavor of jam.
- Bake the cookies. Bake for 15 minutes or until the cookies begin to turn golden brown. Let cool on the baking sheet for five minutes before transferring to a cooling rack to cool completely.
Creaming Butter and Sugar
Thoroughly beating the butter and sugar together is a crucial step in baking, often referred to as “creaming.” This process isn’t just about combining the ingredients, it plays a key role in the texture and structure of your cookies.
When you cream butter and sugar, you’re incorporating air into the butter, which helps create a light and tender texture in the final product. This step ensures your cookies rise properly and have a soft, fluffy texture and will actually result in getting more cookies out of your dough.
This process takes about three to six minutes with a hand or stand mixer. Skipping or rushing this step can lead to dense, heavy cookies, so take your time and let your mixer do the work!
Jam For Thumbprint Cookies
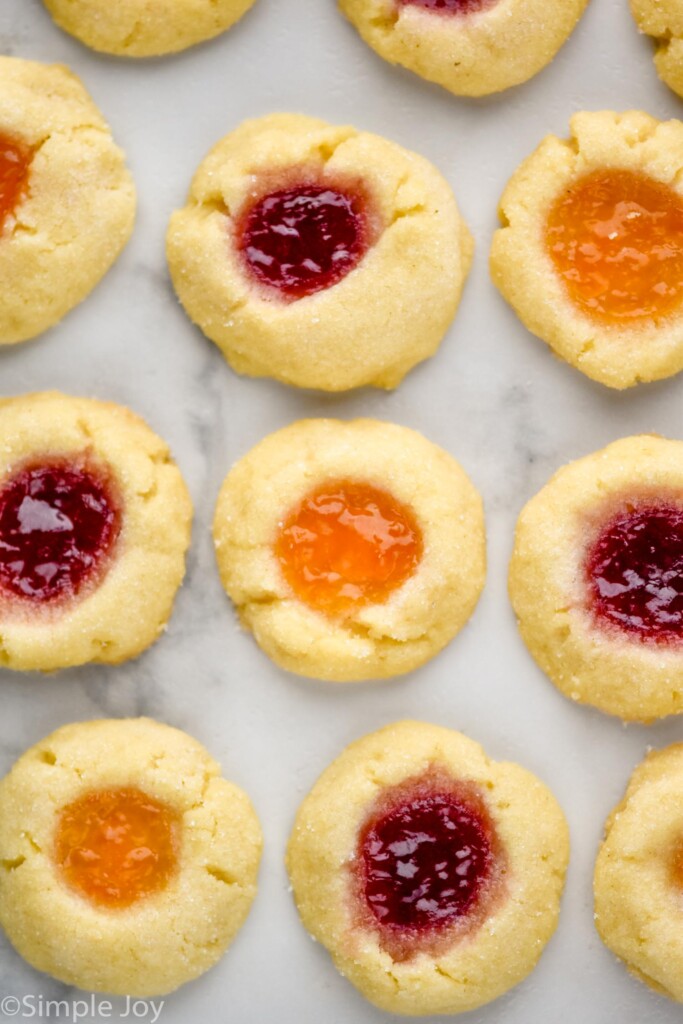
When it comes to choosing jam for thumbprint cookies, the options are endless, and it’s all about personal preference. Fruit jams or preserves work best because their sweet and slightly tart flavors complement the buttery cookie base. Popular choices include raspberry, strawberry, apricot, or even blackberry. The cookies you see pictured here in this post feature raspberry jam and apricot jam.
In addition to raspberry thumbprint cookies, you can experiment with flavors like fig or peach. You might find it easier to microwave the jam for a few seconds before adding to the cookies so it goes into the cookies’ indent smoothly.
Tips and Tricks
- Measure your flour correctly. Getting too much flour can result in cookies that are dry and crumbly. See more on how to measure flour correctly without a scale below.
- Use room temperature butter. It will still feel cold to the touch, yet be soft enough to dent with your finger, but not press all the way through. Read more on why this is so important above.
- Add the flour mixture all at once. Beat on low until it just begins to combine and then turn the power up to high until just combined. This will ensure everything is combined and that your dough isn’t overworked.
- Your dough will seem crumbly. Don’t worry, it will come together when you roll it into balls. If they fall apart when you press your thumb, just push it back together.
- Use a cookie scoop.
- Heat up the jam. As mentioned above, warming up the jam for a few seconds in the microwave will make it easier to put into the cookies.
- Gently tap the baking sheet before baking. This will remove any air bubbles and allow the jam to settle into the thumbprint.
Cookie Scoop
How to Measure Flour
The amount of flour you add to a cookie recipe will make or break how it turns out. Because it is ground so fine, flour packs easily which makes it easy to get too much when measuring. Follow these simple steps to get the correct amount of flour every time.
- Whisk the flour in its container.
- Use a spoon to scoop the flour into a dry measuring cup. Make sure it is heaping on top to ensure you have enough.
- Level off the excess with the flat edge of a spatula or knife.
- Repeat as needed.
How to Measure Flour
Storing and Freezing Thumbprint Cookies
These thumbprint jam cookies can be stored in an airtight container on the counter for up to one week. They also freeze great! Once they are baked and have cooled, put the cookies in a single layer on a parchment-lined baking sheet and put in the freezer to flash freeze. Once frozen, after a few hours, transfer them to a freezer-safe container or bag and store in the freezer for up to three months.
Freezing Cookie Dough
If you want to freeze the dough to bake the jelly thumbprint cookies later, follow the recipe up to the point of rolling the dough into balls and rolling them in sugar. Place the dough balls on a baking sheet and freeze for an hour before transferring the frozen dough balls to a freezer-safe bag or container, which will prevent them from sticking together. Store in the freezer for up to three months.
When ready to bake them, allow the dough to thaw and put them on a baking sheet. Press your thumb into each dough ball, add jam, and bake.
Other Great Cookie Recipes
- Best Sugar Cookie Recipe
- Chewy Oatmeal Chocolate Chip Cookies
- Easy Pecan Sandies
If you make this jam thumbprint cookies recipe or any of my other recipes, I’d be so grateful if you came back and left a comment. I love hearing from you and how you enjoy my recipes!
- Youtube
- Newsletter
Ingredients
- 1 1/2 cups all purpose flour (180 grams)
- 1/8 teaspoon table salt
- 8 tablespoons unsalted butter room temperature (113 grams)
- 3/4 cup granulated sugar plus more for rolling (148.5 grams)
- 1 egg yolk
- 1 teaspoon vanilla extract
- 1/4 teaspoon almond extract
- 1/4 cup jam (80 grams)
Instructions
- Preheat your oven to 325 degrees Fahrenheit. Line a rimmed baking sheet with parchment paper and set aside.
- In a medium bowl, whisk together the flour and salt. 1 1/2 cups all purpose flour, 1/8 teaspoon table salt
- In a large bowl with a handheld mixer or in the bowl of a stand mixer fit with the paddle attachment, beat the butter and sugar together until light and fluffy, about 3 to 6 minutes. 8 tablespoons unsalted butter, 3/4 cup granulated sugar
- Beat in the egg yolk. Once fully combined, beat in the vanilla extract and almond extract. 1 egg yolk, 1 teaspoon vanilla extract, 1/4 teaspoon almond extract
- Add in the flour mixture. Beat on low until it just begins to combine and then turn the power up to high until just combined. This will keep beating down to a minimum and ensure that your dough isn’t overworked. The dough will appear very crumbly but will come together as you scoop it.
- Scoop the cookies with a 1 tablespoon sized cookie scoop or roll into 1-inch balls. Roll in granulated sugar and place on prepared baking sheet. Using a clean finger or thumb, very gently make a small well in the center of each cookie. Fill with desired flavor of jam. If the dough cracks, you can push it back together. 1/4 cup jam
- Gently tap the baking sheet on the counter to help the jam settle in the cookies. Bake for 15 minutes or until the cookies begin to turn golden brown. Let cool on baking sheet for 5 minutes before transferring to a cooling rack to allow to completely cool.

did you make this
Thumbprint Cookies
Facebook
Twitter
Pinterest
Youtube
Newsletter
Snowball Cookies
Spritz Cookies
Chocolate Crinkle Cookies
The Best Snickerdoodles
