<img loading=“lazy” src=“https://www.simplejoy.com/wp-content/uploads/2023/05/Rice-Krispie-Treats-Pin-3-150x150.jpg" onerror=“this.onerror=null;this.src=‘https://blogger.googleusercontent.com/img/a/AVvXsEhe7F7TRXHtjiKvHb5vS7DmnxvpHiDyoYyYvm1nHB3Qp2_w3BnM6A2eq4v7FYxCC9bfZt3a9vIMtAYEKUiaDQbHMg-ViyGmRIj39MLp0bGFfgfYw1Dc9q_H-T0wiTm3l0Uq42dETrN9eC8aGJ9_IORZsxST1AcLR7np1koOfcc7tnHa4S8Mwz_xD9d0=s16000';" alt=“Pinterest graphic for Rice Krispie Treats recipe. Top image is close up photo of a stack of Rice Krispie Treats. Bottom image is overhead photo of person’s hand pulling apart a Rice Krispie Treat. Text says, “super easy Rice Krispie Treats simplejoy.com” - 1”>
<img loading=“lazy” src=“https://www.simplejoy.com/wp-content/uploads/2023/05/Rice-Krispie-Treats-Pin-2-150x150.jpg" onerror=“this.onerror=null;this.src=‘https://blogger.googleusercontent.com/img/a/AVvXsEhe7F7TRXHtjiKvHb5vS7DmnxvpHiDyoYyYvm1nHB3Qp2_w3BnM6A2eq4v7FYxCC9bfZt3a9vIMtAYEKUiaDQbHMg-ViyGmRIj39MLp0bGFfgfYw1Dc9q_H-T0wiTm3l0Uq42dETrN9eC8aGJ9_IORZsxST1AcLR7np1koOfcc7tnHa4S8Mwz_xD9d0=s16000';" alt=“Pinterest graphic for Rice Krispie Treats recipe. Text says, “Soft and chewy Rice Krispie Treats simplejoy.com” Image is overhead photo of a plate of Rice Krispie Treats. - 2”>
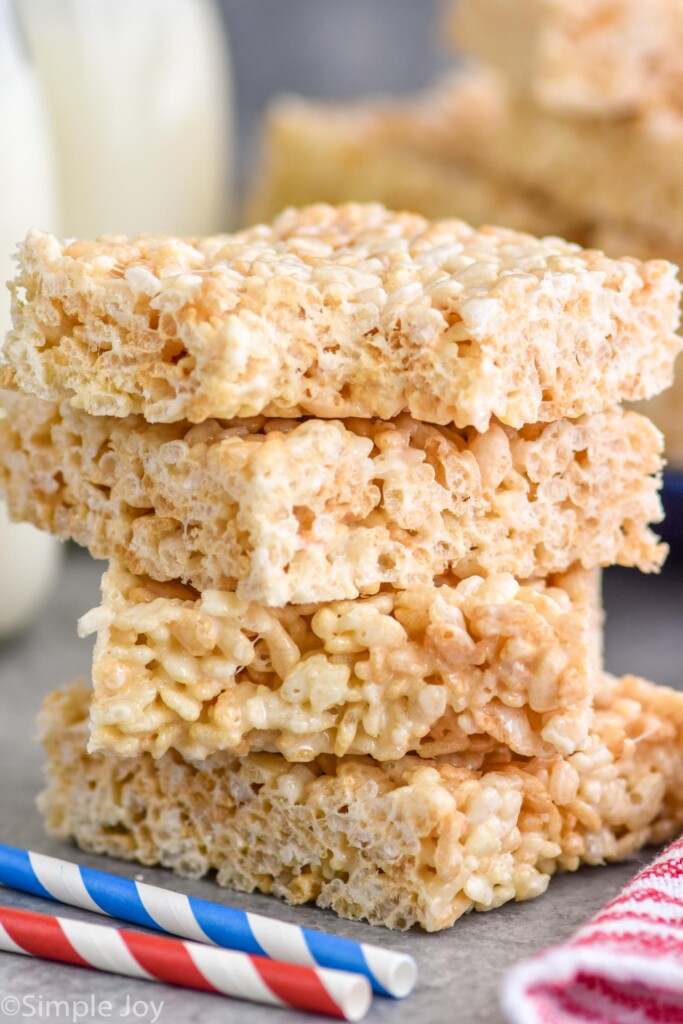
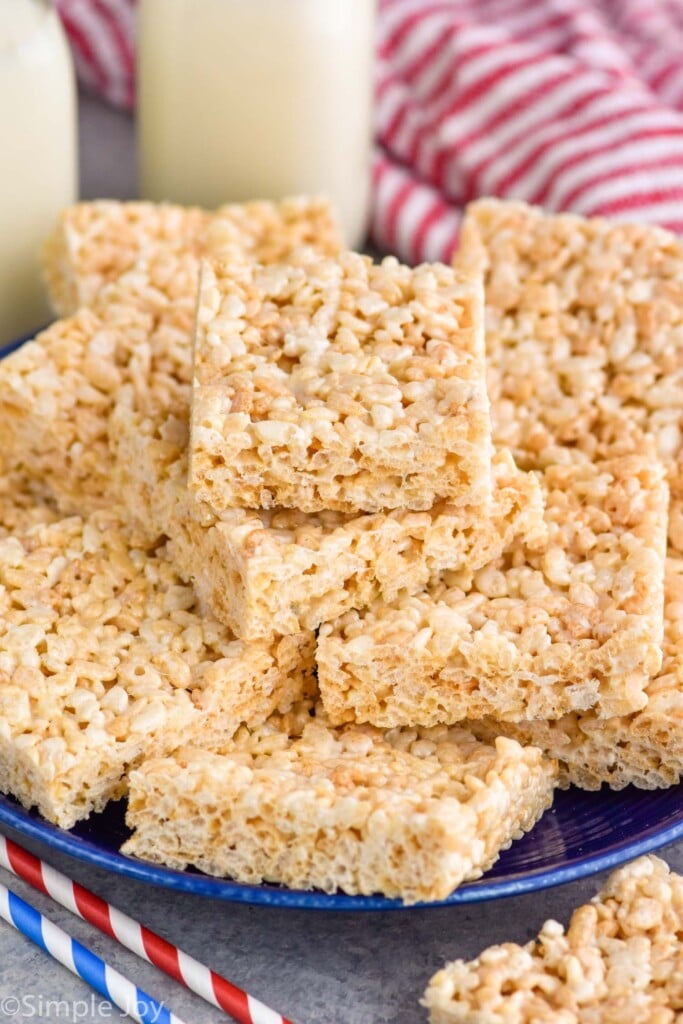
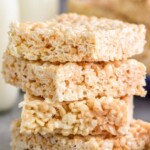
Rice Krispie treats are the best classic treat. This recipe has the best balance of cereal and marshmallows for the perfect dessert!
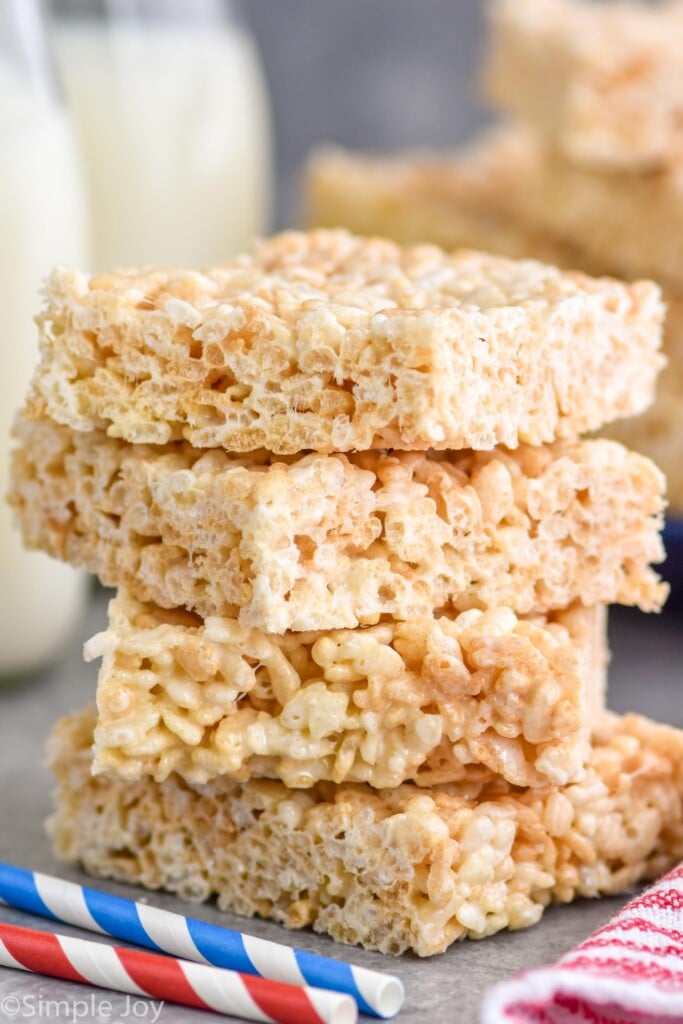
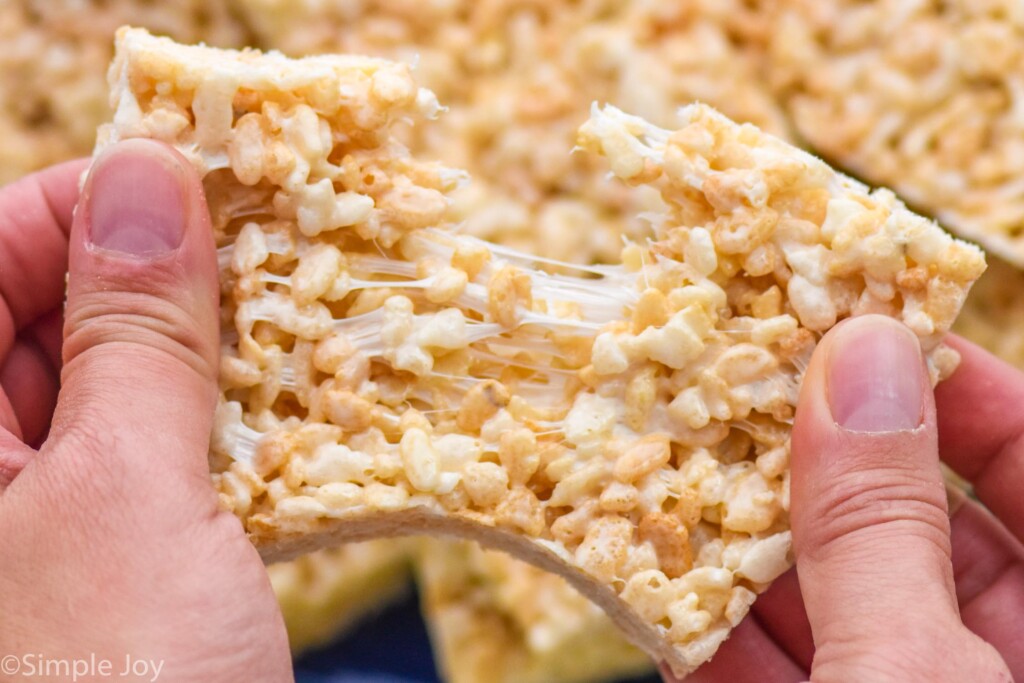
Rice Krispie Treats are the ultimate easy no-bake treat. This version is a little different than what you will find on the box. It has more of the gooey marshmallow filling you love. This will be a treat you make over and over.
How to Make Rice Krispie Treats
Rice Krispie treat cereal, marshmallows, and butter combine in this delicious no-bake bar recipe that is always a crowd-pleaser. Here is a brief overview of how they come together. For the full Rice Krispie treat recipe including all measurements, scroll to the recipe card at the bottom of the post.
- Melt butter and marshmallows. In a saucepan, melt the butter over low heat. Add the marshmallows and allow them to melt with the butter until smooth.
- Add the cereal. Remove the pan from the heat and add the cereal, stirring until it’s fully coated.
- Add the mixture to your baking dish. Press down with more parchment paper, or grease your washed hands and use them to push the mixture into the baking dish. Allow to cool.
My Favorite 9×13 Baking Dish
Tips and Tricks
- Use fresh marshmallows and cereal. Trust me, even though you are melting the marshmallows and making a sticky mixture, they will taste much better if the ingredients are fresh.
- Add sprinkles to the top for a colorful touch.
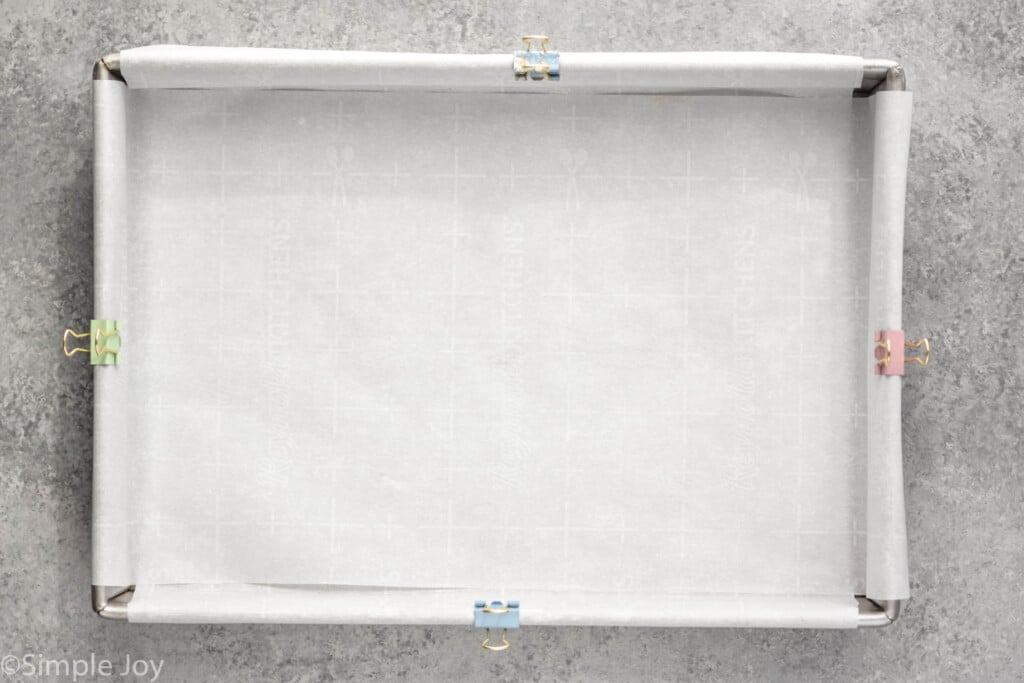
- Line your baking pan with parchment paper prior to making the Rice Krispie treats to prevent the bars from sticking to the pan. When you add the parchment paper, it is helpful to flip the pan over and use the bottom to measure out two pieces, one that will run the length of the pan and one that will run the width. I like to hold the parchment paper in place with small alligator clips like in the photo below.
- Don’t pack the Rice Krispie mixture too firmly into the pan. It will result in bars that are very dense and thin. Press them lightly.
No, Rice Krispie treat cereal contains malt syrup. To make them gluten-free, find a gluten-free rice cereal. Always double-check your labels to make sure none of the ingredients contain gluten.
To make sure the marshmallows are fully melted and everything is well combined, make them on the stovetop.
Storing and Freezing
Store any leftover rice crispy treats for up to four days. These no-bake bars do freeze well! Once cooled, cut into individual bars and store in a freezer-safe container or bag for up to three months. Thaw before enjoying.
Rice Krispie Treat Variations
These fun and festive spins on the best Rice Krispie treats recipe are the perfect way to mix up your treats for holidays or parties with the same no-bake ease.
- Rice Krispies Treats Santa Hats and Christmas Trees
- Carrot Cake Rice Krispies Treats
- Rice Krispies Treat Graveyard
- Cookies and Cream Cake Batter Krispie Treats
Other No-Bake Dessert Recipes
Muddy Buddies Recipe
Easy Fudge Recipe
Edible Sugar Cookie Dough
Instagram
Facebook
Youtube
Newsletter
Ingredients
- 3 tablespoons butter
- 6 cups mini marshmallows (10 ounces mini or large marshmallows)
- 5 1/2 cups puffed rice cereal
Instructions
- Spray a 9 by 13 inch baking dish with cooking spray or line with parchment paper. Set aside.
- In a large saucepan, melt the butter over low heat. Stir in the marshmallows and allow them to melt with the butter until smooth. Turn off the heat.
- Remove from the heat. Pour in the cereal and stir to coat completely.
- Pour the mixture into the prepared dish. Press down with more parchment paper, or grease your washed hands and use them to push the mixture into the baking dish.
- Allow to cool. Remove from the pan and cut into squares. Enjoy or store in an airtight container for up to three to four days.

did you make this
Rice Krispie Treats
Facebook
Twitter
Pinterest
Youtube
Newsletter
Classic Scotcheroos
Lemon Bars
Easy Peanut Butter Balls Recipe
M&M Cookie Bars
Instagram
Facebook
Youtube
Newsletter
Rice Krispie Treats
Ingredients
- 3 tablespoons butter
- 6 cups mini marshmallows (10 ounces mini or large marshmallows)
- 5 1/2 cups puffed rice cereal
Instructions
- Spray a 9 by 13 inch baking dish with cooking spray or line with parchment paper. Set aside.
- In a large saucepan, melt the butter over low heat. Stir in the marshmallows and allow them to melt with the butter until smooth. Turn off the heat.
- Remove from the heat. Pour in the cereal and stir to coat completely.
- Pour the mixture into the prepared dish. Press down with more parchment paper, or grease your washed hands and use them to push the mixture into the baking dish.
- Allow to cool. Remove from the pan and cut into squares. Enjoy or store in an airtight container for up to three to four days.
Nutrition
- Youtube
- Newsletter
